
As an architecture student, you’ll inevitably need to become familiar with a wide range of computer programs. As a professional, architects do most of their work on a computer; so it’s helpful to be computer-savvy, generally, and fluent with the particular software you’ll need to do your job.
Different tasks require different software. Broadly speaking, you’ll need to be comfortable with programs for 3D modeling, drafting, rendering, graphic design, and (to a lesser degree) publishing. Let’s talk about these in greater depth, one at a time:
3D MODELING
There are two broad categories of 3D modeling: 1. BIM & 2. Not BIM.
- BIM stands for Building Information Modeling. I could do an entire deep dive post on BIM, but for now I’ll just give you a broad overview. BIM allows you to model a project in 3D, and then derive 2D drawings for documentation from the model. The best part is that your 2D output is directly connected to the 3D model. Say, for example, you change the size of a door or window in your model. The change is automatically reflected in your plans, elevations, sections, and 3D views. In the United States, Revit is the BIM software that dominates the market. It’s what I, personally, use professionally. If you’re interested in becoming an architect, I’d highly recommend learning it. Dive in as soon as you can; you can download the student version for free. Although not all firms utilize BIM (many very small firms don’t), the vast majority do. Being fluent in Revit opens doors that might otherwise be closed. It’s a crucial tool to at least have in your toolbox. ArchiCAD is the other big-dog of BIM software – but it’s built specifically for Mac Computers, and it’s not nearly as widely used as Revit in the U.S. BIM is at once a 3D modeling program as well as production software (i.e. a tool designed for assembling a set of drawings.)
- Not BIM. There are plenty of 3D modeling programs that are not smart like BIM. In other words, you can model something in 3D, but you can’t easily derive 2D drawings from the model or use the program to put together a set. Though limited, these less robust programs are particularly useful for certain tasks – and are even preferable in some scenarios. They are very good for making quick, schematic models to test out massing and general form. A couple of popular examples of non-BIM 3D software are Sketchup and Rhino. Sketchup is intuitive and easy to use. It’s way faster and easier to produce quick massing models in Sketchup than it is with Revit. With Sketchup, you just push and pull to create 3D form. You’re essentially using a computer to sketch in 3D. Though programs like this are awesome for quick design passes, they function less efficiently (or not at all) as production tools. A common workflow is to start with non-BIM software to work out massing, and then to move into a robust BIM program to finalize and document the design.
DRAFTING
Gather round children, and let me tell you the frightening tale of drawing before Revit. Before BIM, there was digital drafting. Before digital drafting there was hand drafting. Practically nobody hand-drafts to produce construction documents anymore (except for OG’s like Glen Murcutt). CAD (or Computer Aided Design) revolutionized architecture in the 80’s by digitizing the process of drawing a building. Autodesk’s AutoCAD (a specific brand of CAD) and other 2D documentation programs are simply digital drafting software. Instead of drawing a line by hand, you draw it in the computer. That pretty much sums it up. It’s crucial to note that there’s a monumental difference between BIM programs like Revit and strictly drafting programs like AutoCAD. Drafting programs are typically only used for drawing in 2D – not modeling something in 3D. The most important difference, though, is that 2D drafting programs are not smart in the way that BIM programs are. When you draft plans, sections, and elevations in AutoCAD, if you make a change in one view (alter the pitch of a roof, say) unlike Revit, the change will not automatically be reflected in the other views; you have to manually make the change in each drawing like a cave man. This is just begging for coordination errors.
RENDERING
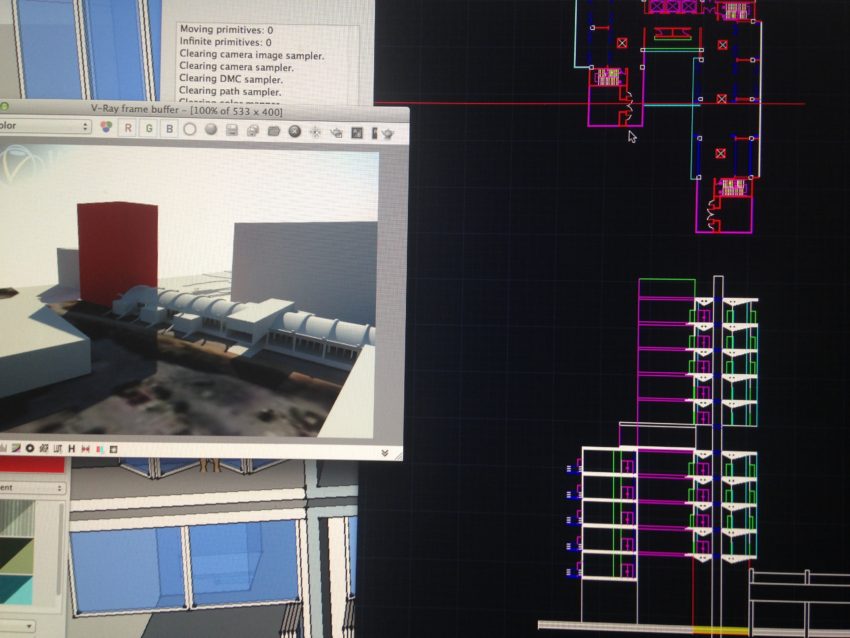
Renderings are emotionally evocative images that communicate the essence of your design. Put simply, they’re basically pretty pictures of your project. Peter Piper plotted a powerful perspective picture of his project for a penultimate pinup. Say that 5 times fast. Perspective “money-shot” renderings are crucial in selling your design, and they’re an important component of any complete architecture presentation. Let’s be honest, the evocative images are what most people notice first and are most drawn to. The bad news, though, is that they’re often an absolute bitch to execute well. Depending on the degree of detail you’re trying to achieve, the process of producing a rendering will likely involve many steps. An entire post could be devoted to a good rendering workflow. For now, just know there’s more than one way to go about it. Though not ideal, you can produce renderings straight out of programs like Revit. More commonly, though, 3rd party rendering programs (like V-Ray, Maxwell, Lumion, for example) are used in conjunction with 3D modeling software to produce the desired effect. After a rendered image is generated, it’s common to do some post-processing polishing work in Photoshop to really make it pop. Generally, the standard workflow is: model, render, post-process. I personally do my modeling in Revit, render with the V-Ray plugin, and then do my touch-up work in photoshop.
GRAPHIC DESIGN
This is a broad term. For architecture presentations, though, I’d say graphic design is a way of stylizing, arranging, and presenting content. For students, it’s useful in producing boards for your various presentations. For professionals, its particularly useful in the SD (schematic design) phase of design. After you produce all the individual components of a project (things like plans, sections, elevations, renderings, sketches, etc.), you’ll need to bring everything together. That’s what graphic design is all about: unifying and packaging all the disparate elements of a project in a cohesive, coherent, compelling way. Adobe Illustrator and Adobe Photoshop are the most popular tools for the job. They’re what I personally use.
PUBLISHING
This is probably the least important tool in your design arsenal, but it’s still useful to know. Publishing software (like Adobe Indesign) is ideal for creating books and publications. It can also be used to create a portfolio, assemble a work sample, or put together boards1 for a presentation. Though you can use Adobe Photoshop or Illustrator for these tasks as well, the more pages your publication is, the more indispensable a program like Indesign becomes. Assembling a book in photoshop is what nightmares are made of.
SUMMARY
Scared off yet? It’s a lot to learn for sure, but trust me – if I can do it, you can do it. When I started architecture school, I was not a computer whiz & I didn’t have an ounce of experience with any of this software. Prior to school I used computers for the absolute basics, and that was it. The degree to which software is explicitly taught varies from school to school. I had only one class in my school career that formally taught software. And get this – the one piece of software they did teach was (to my absolute bewilderment) FORM-Z: a virtually obsolete non-BIM 3D modeling program2. Hopefully, if your school teaches software, they’ll teach something you can actually use after graduation. Regardless, over the course of your education, you’ll pick up these programs one way or another – even if it’s by osmosis from constant exposure.
Everyone learns differently, but in my experience, the best way to learn a completely foreign software is to just dive in. Download it, open it up, and just play around for a while. Click a bunch of buttons, hover over stuff to see what the description says, randomly use a bunch of tools. Just dive in. Only after this initial messy plunge should you create a more structured plan for learning. My personal preference for structured learning is video lectures. I have a monthly subscription to LinkedIn Learning, but there are plenty of quality video training companies out there (like PluralSight & Udemy to name a couple). These are all paid services, but they’re reasonably priced. In terms of free video databases, YouTube is far and away the best resource out there. At the end of the day, there’s a lot of software you’ll need to learn. It can be intimidating at first, but if you’re dedicated and put in the time, you’ll be just fine. If you have any specific questions about software (especially Revit since that’s what I use on a daily basis), don’t hesitate to let me know. Go forth my grasshoppers. Godspeed.
1When I first heard the term “boards,” I had no idea what that meant. My professor asked us to assemble boards for a project, and I was like “wtf, you want us to build something?” As it turns out, board is just a fancy term for an (often large format) sheet of paper that has your curated work on it and is used in a presentation.
2Before I get death threats from the Form-Z evangelists of the world, let me at least acknowledge that I do know people who like this program and can produce cool looking stuff with it.